HTML
Posted on May 19th, 2020
Today’s topics
- Learn about HTML tags and elements
- Create a page with HTML
Intro to GitHub Classroom
We are using a tool called GitHub classroom to generate a repository (repo) on GitHub for each student to work in.
Each day we will share an assignment invitation here on this page. Clicking on the link will take you to a page where you will see as message that looks something like this:
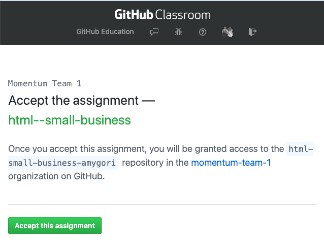
You’ll see your github username as part of the repo name instead of amygori. When you accept the assignment, GitHub will create your homework repo and, when it is done, give you a link to it (from now on, this is the link you will use to see your project on GitHub, NOT the assignment invitation link). Go to that newly created repo and click on the green button to “Clone or download” your repo. This will copy the repo’s url to your clipboard.
In your terminal, navigate to the folder where you intend to keep your projects. When you are in the directory you want to be in, type git clone <url-for-your-repo>, but in place of
Using VS Code
VS Code (or Visual Studio Code) is a text editor made by Microsoft. It is free and open source, and it’s used by many professional developers these days.
If you haven’t installed it yet, see the Setting Up Your Computer instructions for how to do that.
See Getting Started with VS Code for an overview and a video intro to using this tool.
Project
Build a Small Business Website
Link to the assignment invitation
Quick video showing how to clone your assignment repo
Links from class
- MDN Getting Started with HTML
- MDN HTML Resources Page
- A Brief History of Markup
- A short history of the web
- Asking technical questions: Your Brain’s API
- class slides PDF
- example code from class: bears site
- Quick video showing how to clone your assignment repo
- afternoon class video Access Password: 5b^@zXj&